Creating festive wall art is a delightful way to personalize your space and bring a touch of joy to any room. Whether you’re gearing up for the holiday season, preparing for a special occasion, or simply want to add some color to your daily life, DIY wall art is both a fun and creative outlet. Here are some tips and tricks for home decorators looking to craft their own festive wall art:
1. Choose Your Theme Wisely
Before you dive into creating your artwork, decide on a theme that fits the occasion. For holiday-themed art, consider motifs like snowflakes, stars, or Christmas trees. If it’s for a general festive feel, think about abstract designs using vibrant colors that pop.
2. Gather Your Materials
You don’t need expensive supplies to create beautiful wall art. Here’s a basic list to get you started:
- Canvas or large paper sheets for the base
- Acrylic paints, brushes, and markers
- Decorative elements like glitter, sequins, and fabric scraps
- Adhesives such as glue or mod podge
- Stencils and tape for creating designs
3. Set Up Your Workspace
Choose a spacious area and cover your work surface with newspapers or a cloth to protect it. Make sure you have good lighting and all your materials are within easy reach.
4. Sketch Your Design First
Using a pencil, lightly sketch your design on the canvas or paper. This initial outline serves as a guide and helps prevent mistakes. If drawing isn’t your forte, you can use stencils or print out designs to trace.
5. Play with Colors and Textures
Don’t be afraid to experiment with different colors and textures. Mix and match shades that complement each other and add elements like fabric or paper cutouts to create depth. Using items like lace or pressed flowers can also add a unique touch.
6. Add Layers
Layers give your art a professional and intricate look. Start with a base layer of paint, let it dry, then add additional layers. You can use techniques like sponging, splattering, or dabbing to achieve different effects.
7. Focus on the Details
Once the main elements are in place, use finer brushes or a marker to add small details. This can be anything from highlighting certain areas to adding tiny dots, stripes, or other patterns.
8. Let It Dry
Ensure your art is completely dry before you move or hang it. Depending on the materials used, it might take several hours to a full day for the paint and glue to dry thoroughly.
9. Protect Your Artwork
To preserve your artwork, apply a clear acrylic sealer over the surface. This step is especially important if you used materials that might fade or peel off.
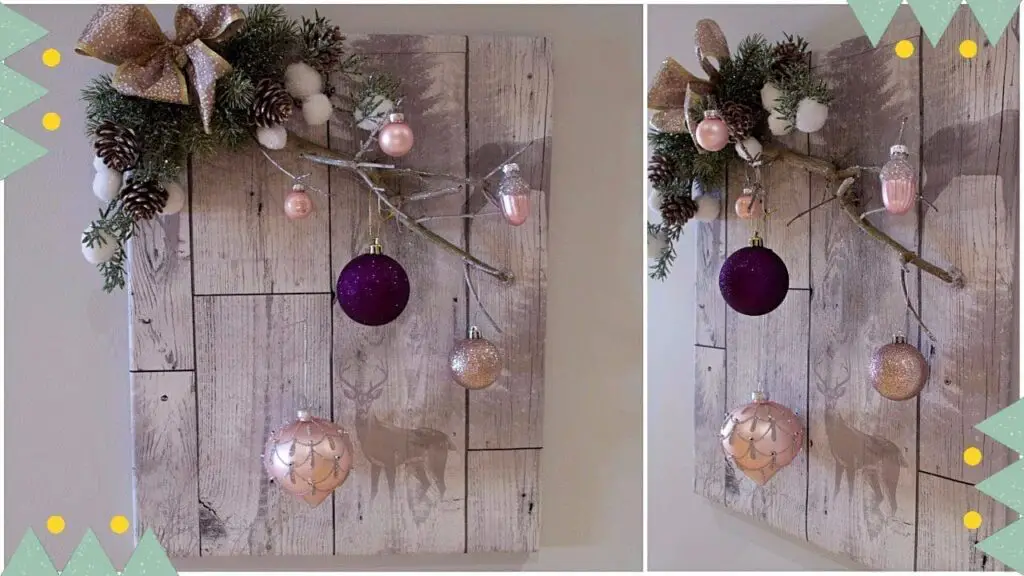
10. Display with Pride
Finally, find the perfect spot to hang your DIY festive wall art. Whether it’s above your fireplace, on your front door, or in a cozy corner, make sure it’s visible and complements the rest of your decor.
Creating your own wall art not only enhances your living space but also offers a satisfying sense of accomplishment. Each piece you create will be unique, filled with your personal touch and creative flair. So gather your materials, set aside some time, and let your creativity flow!