Creating a beautifully edged garden is like framing a masterpiece. The edges not only define the space but also enhance the overall aesthetic of your garden. Here are some expert tips to help you craft elegant garden edging that will transform your outdoor space into a stunning sanctuary.
1. Choose the Right Materials
The first step in crafting elegant garden edging is selecting the right materials. There are various options available, each offering a unique look and feel:
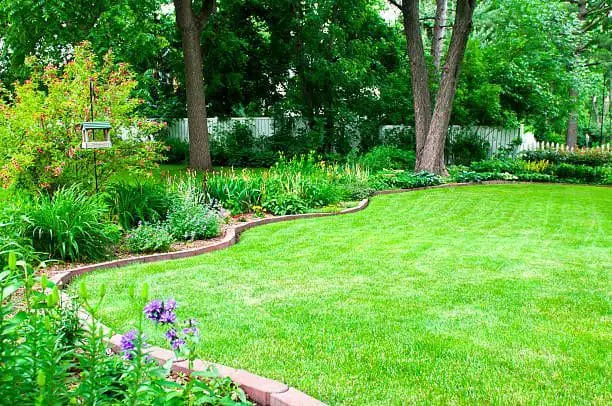
- Stone: Natural stones like granite, limestone, or slate provide a timeless and durable edge. They blend seamlessly with most garden styles and add a touch of elegance.
- Brick: Bricks offer a classic and neat appearance. They are versatile and can be laid in various patterns, such as herringbone or basket weave, to create visual interest.
- Metal: Steel or aluminum edging is sleek and modern. It’s perfect for creating clean, straight lines and is highly durable.
- Wood: Timber edging, like cedar or redwood, brings a rustic charm. It’s great for informal gardens and can be stained or painted to match your garden’s color scheme.
2. Plan Your Design
Before you start, it’s crucial to plan your design. Consider the shape and layout of your garden beds and how the edging will complement them. Here are some design tips:
- Curved Edges: Soft, flowing curves create a natural and organic feel. They are ideal for informal or cottage-style gardens.
- Straight Edges: Clean, straight lines offer a formal and structured look. They are perfect for contemporary or minimalist gardens.
- Combination: Mixing straight and curved edges can add visual interest and balance to your garden design.
3. Prepare the Ground
Proper preparation of the ground is essential for a lasting and elegant edge. Follow these steps:
- Mark the Area: Use a garden hose or string to outline the desired edge shape. This will serve as your guide.
- Dig a Trench: Dig a trench along the marked line. The depth and width will depend on the material you’re using. For most materials, a trench 4-6 inches deep and 2-4 inches wide is sufficient.
- Level the Base: Ensure the bottom of the trench is level. This will provide a stable base for your edging materials.
4. Install the Edging
The installation process varies depending on the material chosen. Here are some general guidelines:
- Stone and Brick: Lay the stones or bricks in the trench, ensuring they are level and tightly packed. You may need to cut some pieces to fit the desired shape. Use a mallet to tap them into place.
- Metal: Insert metal edging into the trench, ensuring it stands vertically. Secure it with stakes driven into the ground at regular intervals.
- Wood: Place the wooden boards or logs in the trench. Use stakes to anchor them securely, ensuring they are level and straight.
5. Finish and Maintain
Once your edging is installed, add the finishing touches:
- Backfill: Fill in the trench with soil or mulch, packing it firmly around the edging.
- Seal: If using wood, consider applying a sealant to protect it from moisture and pests.
- Maintenance: Regularly check your edging for any signs of wear or damage. Clean metal and stone edging as needed to keep them looking their best.
Conclusion
Crafting elegant garden edging requires careful planning, the right materials, and attention to detail. By following these expert tips, you can create a beautiful and functional border that enhances the overall appeal of your garden. Whether you opt for the timeless beauty of stone, the classic charm of brick, the modern sleekness of metal, or the rustic allure of wood, well-crafted garden edging will make your garden stand out and bring your outdoor vision to life.