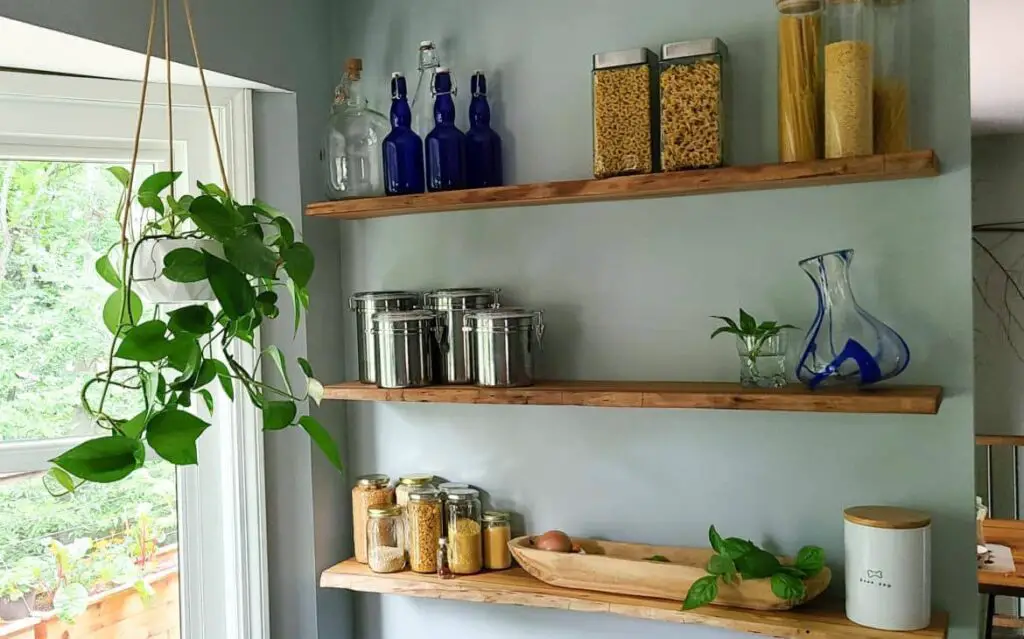
Transforming your kitchen with stylish and functional floating shelves doesn’t have to be a costly or complex endeavor. With a few simple tools and materials, you can create beautiful floating shelves that add both storage and aesthetic appeal to your kitchen. This guide will walk you through the process, offering easy and affordable solutions for a DIY floating shelf project.
Materials Needed:
- Wood Boards: Choose boards that match your kitchen decor. Common options include pine, oak, or reclaimed wood.
- Shelf Brackets: Floating shelf brackets are essential for the invisible mounting look.
- Screws and Wall Anchors: Ensure they are appropriate for the weight of the shelves and items you plan to store.
- Sandpaper: For smoothing the wood.
- Paint or Stain: Optional, depending on the finish you desire.
- Measuring Tape and Level: For precise installation.
- Drill and Screwdriver: Necessary tools for mounting the shelves.
Steps to Install Floating Shelves:
- Plan and Measure: Begin by deciding where you want to install the shelves. Measure the length, width, and height to ensure they fit perfectly in your desired space. Mark these points on the wall with a pencil.
- Cut and Prepare the Wood: Cut the wood boards to your desired length. Sand the edges and surfaces to remove any splinters and create a smooth finish. If you’re painting or staining the wood, do so now and let it dry completely.
- Install Brackets: Using a stud finder, locate the wall studs where you’ll mount the brackets. This ensures your shelves will be sturdy and capable of holding weight. If studs are not available in the desired location, use wall anchors. Install the brackets by drilling pilot holes and then securing the brackets with screws.
- Mount the Shelves: Once the brackets are securely in place, align the shelves on top of them. Ensure the shelves are level before securing them. You may need an extra pair of hands to hold the shelf while you drill it into the brackets.
- Secure and Finish: After the shelves are mounted, give them a gentle tug to ensure they are secure. Arrange your kitchen items on the shelves, balancing weight evenly to avoid any potential sagging over time.
Tips for Success:
- Choosing the Right Wood: Consider the style of your kitchen when selecting wood. Reclaimed wood offers a rustic look, while a painted finish can complement modern or traditional designs.
- Weight Distribution: Evenly distribute weight across the shelves to prevent them from sagging. Heavier items should be placed near the brackets for better support.
- Safety First: Always double-check that your shelves are securely fastened, especially if you plan to store heavy items like glassware or cookware.
Affordable Design Ideas:
- Minimalist Look: For a clean and modern look, use white or light-colored wood and brackets. This creates a spacious and airy feel.
- Rustic Charm: Opt for reclaimed wood with natural imperfections. Pair with industrial-style brackets for a farmhouse-inspired kitchen.
- Color Pop: Paint the shelves a bold color to add a fun and unexpected element to your kitchen decor.
By following these steps, you can create your own DIY kitchen floating shelves that are both easy to install and budget-friendly. Not only will you gain extra storage space, but you’ll also enhance the visual appeal of your kitchen, making it a more enjoyable space to cook and entertain in.


