Introduction
A kitchen photoshoot is more than just capturing the aesthetics of culinary spaces. It’s an intricate process that combines art, technology, and meticulous planning to produce images that inspire and captivate. Here’s a behind-the-scenes look at what goes into making those perfect kitchen shots.
Concept Development
Before the camera even comes out, there’s a significant amount of pre-production work. The first step is to define the concept. What is the shoot’s goal? Is it to showcase a modern kitchen’s sleek design, highlight the warmth of a rustic kitchen, or focus on the functionality of a professional kitchen? The concept will dictate the mood, style, and ultimately, the story that the photos will tell.
Planning and Preparation
Once the concept is established, the planning phase begins. This involves:
- Scouting the Location: Finding the perfect kitchen that matches the vision. This could be a real kitchen in a home, a studio set, or a professionally designed kitchen showroom.
- Styling the Kitchen: Ensuring the kitchen is aesthetically pleasing. This may include arranging props like utensils, food items, plants, and décor elements to enhance the visual appeal.
- Lighting Setup: Good lighting is crucial in photography. Natural light is often preferred for its soft and inviting quality, but artificial lighting setups are used to control shadows and highlight specific areas.
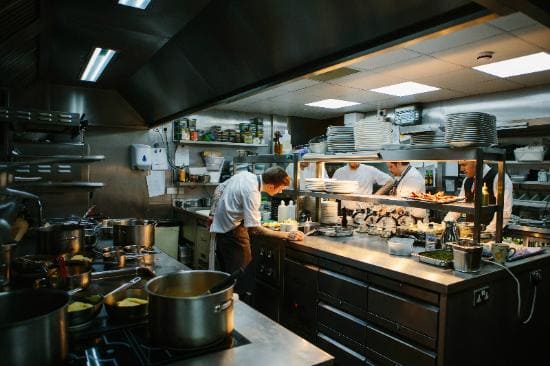
On the Day of the Shoot
On the actual day of the photoshoot, a team of professionals comes together to bring the vision to life. Here’s a breakdown of their roles and actions:
- Photographer: The lead creative who sets up the camera angles, adjusts the lighting, and captures the images. They need to have a keen eye for detail and composition.
- Stylist: Ensures everything in the frame looks perfect. This includes arranging props, adjusting the placement of items, and making sure the kitchen looks lived-in yet pristine.
- Lighting Technician: Manages the lighting equipment, making adjustments as needed to achieve the desired effect. They work closely with the photographer to create the right mood.
- Assistants: Help with various tasks such as moving equipment, holding reflectors, or even holding a light meter.
Shooting Process
During the shoot, multiple shots are taken from different angles to provide variety. Here are some common shots:
- Wide Shots: Capture the entire kitchen, giving a sense of space and layout.
- Close-ups: Focus on specific details like a beautifully arranged countertop, intricate tile work, or a delicious dish.
- Lifestyle Shots: Sometimes, models are used to simulate real-life scenarios, such as a chef cooking or a family enjoying a meal.
Post-Production
After the shoot, the post-production phase begins. This involves:
- Selection: Reviewing all the photos taken and selecting the best ones.
- Editing: Enhancing the selected photos using software like Adobe Photoshop or Lightroom. Adjustments may include correcting colors, retouching surfaces, and enhancing lighting.
- Final Review: The edit photos are reviewe and finalize. This may involve further tweaks to ensure they meet the desired quality and aesthetic.
Conclusion
A kitchen photoshoot is a collaborative and detailed process that requires careful planning and execution. From concept development to post-production, each step is crucial in creating stunning visuals that bring the kitchen to life. The result is a set of images that not only showcase the beauty of the kitchen but also tell a compelling story that resonates with viewers.