Photography, while often perceived as an outdoorsy venture, doesn’t have to be limited to the great outdoors. For many photographers, especially those who are enthusiasts or working from home, creating engaging, high-quality images indoors can be not only a creative challenge but also an artistic necessity. This guide will walk you through the process of designing DIY photography backgrounds that transform your indoor spaces into professional photo studios, helping your photographs stand out and captivate viewers.
Understanding the Importance of a Good Background
The background of a photograph can be just as impactful as the subject itself. It sets the scene, tells a story, and can either elevate a good photo to greatness or detract from the subject if chosen poorly. Effective backgrounds are the unsung heroes of photography, providing depth, context, and atmosphere to the composition.
Materials You’ll Need for DIY Backgrounds
Creating your own photography backgrounds does not require expensive materials or tools. Here’s what you typically need:
- Fabric: Choose from materials like muslin, canvas, or any large fabric pieces. These are ideal for creating seamless looks.
- Paints and Brushes: If you wish to customize your fabric backgrounds, acrylic or fabric paints can be used for that personal touch.
- lessCopy code
- **Paper Rolls:** Paper backgrounds are inexpensive and come in a variety of colors, providing a smooth, consistent backdrop that's easy to replace. - Wood Panels: For a more rustic or textured look, wood panels can be stained, painted, or left raw depending on the desired effect.
- Portable Stands or Clamps: These are use to hold your backgrounds in place and can be adjust as need for different effects.
Step-by-Step Guide to Creating Fabric Backgrounds
- Choose Your Fabric: Look for colors and textures that complement your subject. Neutral colors tend to be more versatile, but vibrant backgrounds can be great for dramatic effects.
- Size It Right: Ensure the fabric is large enough to cover the entire background of your potential shot, plus some extra for framing.
- Customize Your Design: Use paints or other materials to add patterns, textures, or gradients.
- Set It Up: Hang the fabric on a portable stand or attach it to your wall with clamps.
Crafting Paper Backgrounds
- Select the Paper: Seamless paper rolls are available in various widths and colors. Choose a color that suits your project.
- Roll It Out: Attach the roll high enough to cover the background and allow it to roll down to the floor, creating a curve. This eliminates harsh lines and shadows.
- Secure It: Use tape or weights at the bottom to keep the paper taut and in place.
Building Wood Panel Backgrounds
- Gather Your Materials: Reclaimed wood or new panels can be use. Sand down the surfaces if necessary to avoid splinters.
- Assemble the Panels: Depending on the desired size, you might need to nail or screw the panels together.
- Finish as Desired: Paint, stain, or varnish your wood panels to match the mood of the photographs you intend to take.
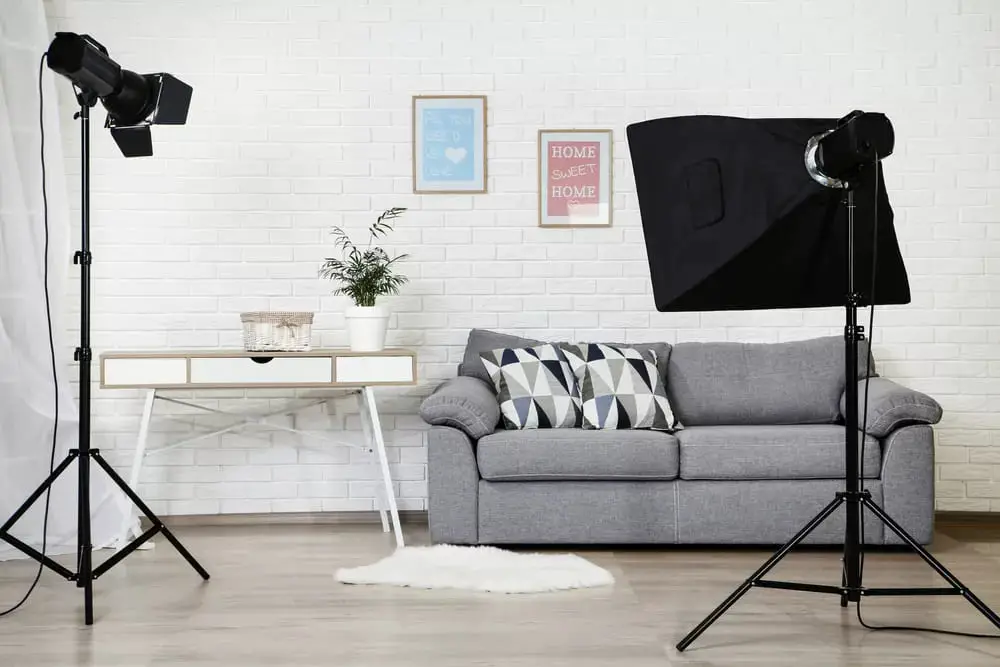
Tips for Using Your DIY Backgrounds
- Lighting: Proper lighting can dramatically enhance the look of your backgrounds. Experiment with different setups to see what works best with your materials.
- Maintenance: Keep your backgrounds clean and store them properly when not in use. Fabric can be foldE and paper should be rolled.
- Versatility: Build a small collection of different backgrounds so you can quickly switch them out depending on the project.
Conclusion
DIY photography backgrounds are not just cost-effective; they are also a pathway to creative freedom. With simple materials and a bit of ingenuity, you can enhance your indoor photography dramatically, allowing you to shoot high-quality photos that are visually appealing and professional. Whether you are a hobbyist looking to explore new aspects of photography or a professional wanting to refine your studio settings. DIY backgrounds give you control over every element of your photograph.